

Microsoft Dynamics CRM 2011, creating custom system charts
Vlad Arabajiev, 02 December 2011
The latest Update Rollup 5 in Microsoft Dynamics CRM 2011 introduces some really cool new features. There are improvements in creating and editing System and Personal charts. New enhancements are added in working with Dialogs and Workflows. Data management is also improved, there have been CRM Outlook Client Enhancements and now users are also able to follow important activities articulated with Accounts, Contacts, Leads and more.
 *
*
In this blog I will cover the creation and editing of system charts. We shall see that the Chart Designer is slightly different from what it was before Update Rollup 5. In order for this to work for you, you have to make sure that you have updated your Microsoft Dynamics CRM 2011 organization with the latest updates. If you haven’t done so, here is a link http://www.microsoft.com/download/en/details.aspx?id=27820 .
Let’s do this.
Step 1
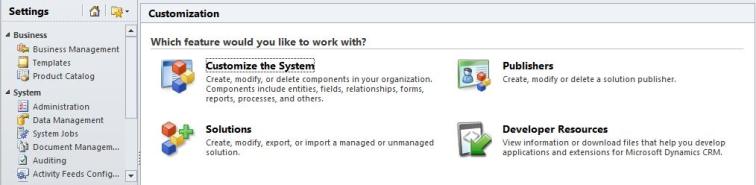
Go to Settings in the navigation pane, then hit Customizations in the Customization area, then Customize the System.
Step 2
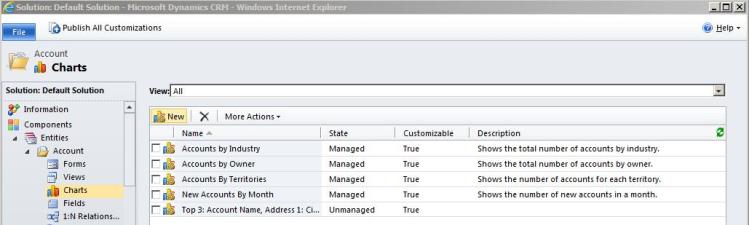
Expand Entities and pick an Entity you would like to work with, and select Charts. In this scenario I will use the Accounts entity.
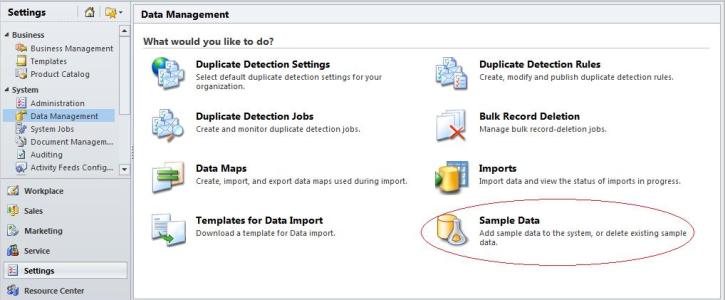
It is a good time to mention that you will need to have some sample data in your system if we are to create and edit charts. If you have no data, then go to Settings – Data Management – Sample Data. The sample data will be installed asynchronously i.e. in the background which means you can still work with CRM, so let’s carry on.
To proceed select Charts, within the Account Entity, now click New.
Step 3
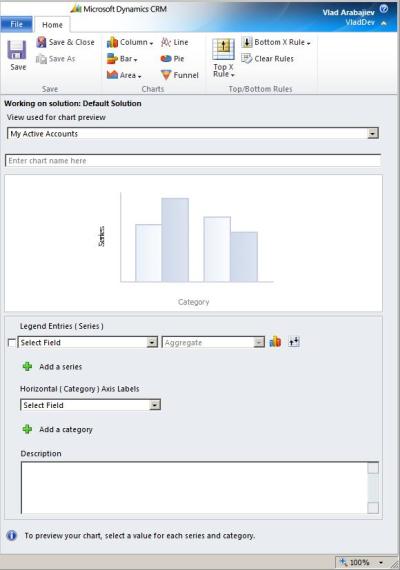
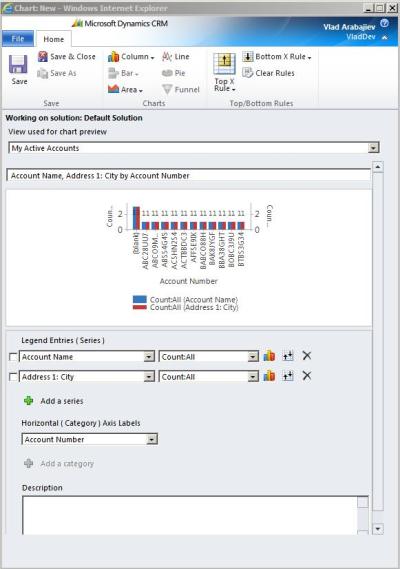
This is the New Chart Window in CRM 2011, Update Rollup 5. You will notice that now we are able to create a chart with multiple series, click Add a Series icon (green plus button )
Step 4
I will pick the following Legend Entries with one Horizontal Axis Label; you see that there is quite a bit of information displayed here which makes it hard to comprehend.
Step 5
To get a better idea of this data, we can apply the Top X or Bottom X rules to display top or bottom items from the Chart, we can also click Custom to specify a different number.
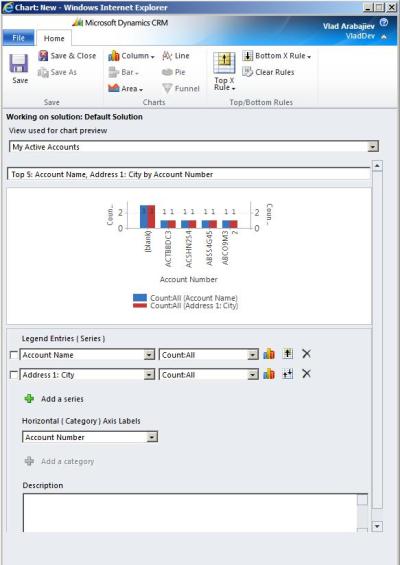
In this case, I have picked Top 5 items for Account Name and we can see the change is significant in data representation.
Depending on your needs you can modify the Legend Entries and/or The Horizontal ( Category ) Axis Labels. Once you have chosen your data sources and applied (if required) Top X and Bottom X Rules, give a meaningful name for the Chart and Save it.
Update Rollup 5 increases functionality and efficiency of Dynamics CRM 2011. The best way to familiarize yourself with the cool new features is just to play around with the system. It is worth mentioning that Update Rollup 5 cannot be uninstalled. It is wise to back up your databases and application servers before you install this update. I hope you found this blog useful and easy to follow.
Image * from http://www.microsoft.com/download/en/details.aspx?id=27820
Category List

Filter by Author
Adam Murchison
Alfwyn Jordan
Arthur Mandisodza
Calum Jacobs
Colin Maitland
David Mochrie
Dominic Liu
Gayan Perera
Harshani Perera
Isaac Stephens
Jaime Smith
Jared Johnson
John Barrencechea
John Eccles
Lauren Withers
Paul Nieuwelaar
Roshan Mehta
Roz Millar
Ryan Blaikie
Ryan Ingram
Sarah Coleman
Sean Roque
Shalane Williams