

How to Run Test Cases in Azure DevOps
Harshani Perera, 28 June 2021
In Software testing, test cases are the step-by-step instructions carried out to verify the behaviour of a Software application. There are many tools to write test cases such as Excel, XMind, Testing tools or even Word. Azure DevOps is also a tool that provides the ability to create test cases easily. It has features to create test plans, test suites, charts, run test cases, replicate test cases, export to Excel and much more.
If your organisation uses Azure DevOps already, it will provide a single place to keep all your test cases together for all projects in a clear readable format. They can be accessed at a later date to reused or by a new member joining the organisation.
In this blog, I will provide you with simple instructions on how to create and run test cases in Azure DevOps.
Step 1: Login to your Azure DevOps Environment e.g., https://dev.azure.com/companyname/ and select the project you are working on.
Create a Test Plan
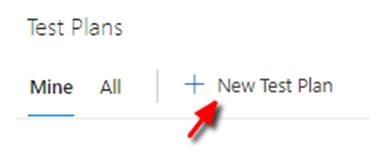
Step 2: Select Test Plans from the left navigation and click + New Test Plan


Step 3: Fill the Name, Area Path and Iteration > Click Create

Create a Test Suite
This is not mandatory as you can create test cases in the Test plan however you can also nest your test cases inside a Test Suite.

I will create a Test Suite called ‘Functional Test Cases’.
Step 4: Click the 3 dots next to the test plan > select New Suite > select Static Suite.

Type the name of the Test Suite e.g., Functional Test Cases

Create a Test Case
Step 5: Select the suite that you want to create the Test cases i.e., in my example, I will select Functional Test Cases.

The important thing to notice here are the following sections: Define, Execute and Chart.
Define – To create Test cases
Execute – To run Test cases
Chart – To display results of Test cases and Test runs

Step 6: The blueline indicates the area you are currently in. To create a test case, select Define > Click New Test Case

Fill the required details on the Test Case and click Save & Close.

Your Test Case will be displayed. You can continue to create more Test Cases by clicking the New Test Case button.

Run a Test Case
Step 7: To run a test case, select the Execute section. You will see the test case you just created.

Step 8: Select the test case > Select either Run for web application or one of the other options that suits.

Step 9: Pass or fail the Test case > Click Save/Save and Close.

You can see the outcome of the Test case.

Create a Chart
The last step will show you how to create a chart with the test cases and test runs.
Step 10: Select Chart section > Click New > Select New Test result chart

Select Chart Type = Pie and Group by Outcome > Click OK

Repeat Step 10 but select New to create a test case chart. I selected a Pie Chart and to Group by State, but you can select the option that suits the chart you would like to show.
Following are the two charts I created with the test data.

As you can see, it is very easy to manage your testing with Azure DevOps. It allows to create test plans, test suites, test cases, run them and create charts. You can replicate these test cases for regression testing in a new test suite and they are in an easy-to-read format.
This is a basic guide on what Azure DevOps can do. In my future blogs, I will show you some more advanced features that can help you test more efficiently using Azure DevOps.
Category List

Filter by Author
Adam Murchison
Alfwyn Jordan
Arthur Mandisodza
Calum Jacobs
Colin Maitland
David Mochrie
Dominic Liu
Gayan Perera
Harshani Perera
Isaac Stephens
Jaime Smith
Jared Johnson
John Barrencechea
John Eccles
Lauren Withers
Paul Nieuwelaar
Roshan Mehta
Roz Millar
Ryan Blaikie
Ryan Ingram
Sarah Coleman
Sean Roque
Shalane Williams