

Dynamics CRM Pinned Shortcut to Taskbar in IE 9
Paul Nieuwelaar, 28 September 2010
With the release of IE9 comes several cool things that you can do to Dynamics CRM the one that stood out to me is to do with Pinned Site Shortcuts and how they can help in Dynamics CRM 4.0 with a bit of html that is added to the ‘loader’ file in the Dynamics CRM program files you can improve productivity and reduce mouse click by a considerable amount.
First I’ll demonstrate how Pinned Site Shortcuts work and then I’ll show the way to add the code.
First of all if you don’t have the internet explorer 9 beta you will have to download it which you can get here: http://windows.microsoft.com/en-US/internet-explorer/download/ie-9/worldwide
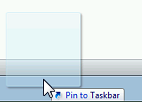
Once you have installed it open up IE 9. Once open, go to the website that you want to make a task bar shortcut for, this can be your Dynamics CRM system or any website. To get the website to your task bar you simply have to drag the tab with your open webpage down to the task bar.
![]()
Once it comes up with a box saying ‘pin to task bar’ you then have to release.
This then puts the logo on the task bar and also customizes the colours in the browser.
![]()
![]()
That’s all there really is to it.
Now for the more complicated part, what you need to do is find the html code that controls your website or Dynamics CRM System. But before you make any changes go and remove the pinned shortcut if you have already made one, for your website this will be in your FTP but for your Dynamics CRM system this will be on your server or your host’s server.
Note: The following paragraph only applies if you are changing the CRM html file.
Once you are on your server you will need to find a file called ‘loader.aspx’ this is most commonly found at the following locations.
C:\Program Files\Microsoft CRM Server\CRMWeb\
Once you have found that, open it up in a code editing program.
Note: Always back up the files before you edit anything.
Once you have it open, inside the head tags you will need to place this code below and edit the URL’s and icon URL’s that are highlighted along with the highlighted task names.
<!--IE9 Code begins-->
<meta name="application-name" content="Site Shortcut Name" />
<meta name="msapplication-starturl" content="http://sample.crm.com/" />
<meta name="msapplication-tooltip" content="Sample tooltip" />
<meta name="msapplication-task" content="name=Sample 1; action-uri=http://sample.crm.com/; icon-uri=http://sample.crm.com/icon.ico" />
<meta name="msapplication-task" content="name=Sample 2; action-uri=http://sample.crm.com/; icon-uri=http://sample.crm.com/icon.ico" />
<meta name="msapplication-task" content="name=Sample 3; action-uri=http://sample.crm.com/; icon-uri=http://sample.crm.com/icon.ico" />
<meta name="msapplication-task" content="name=Sample 4; action-uri=http://sample.crm.com/; icon-uri=http://sample.crm.com/icon.ico" />
<!--IE9 Code Ends-->
Once you have edited everything that is highlighted above you should save the file. To check that it is working you will need to go to your Dynamics CRM or website and pin it to the task bar, from there you need to right click and if it is done correctly it should show the tasks.
Category List

Filter by Author
Adam Murchison
Alfwyn Jordan
Arthur Mandisodza
Calum Jacobs
Colin Maitland
David Mochrie
Dominic Liu
Gayan Perera
Harshani Perera
Isaac Stephens
Jaime Smith
Jared Johnson
John Barrencechea
John Eccles
Lauren Withers
Paul Nieuwelaar
Roshan Mehta
Roz Millar
Ryan Blaikie
Ryan Ingram
Sarah Coleman
Sean Roque
Shalane Williams